You just subscribed to a NimbusBackup plan and received your PBS credentials by email. This guide walks you step-by-step through connecting your remote Proxmox Backup Server to your Proxmox VE infrastructure, configuring your first backup job, and verifying everything works. Estimated time: 10 minutes.
Prerequisites
What you need:
- Proxmox VE 7.x or higher — installed and accessible via the web interface
- PBS credentials — received by email when your NimbusBackup plan was activated
- Administrator access to PVE (root role or equivalent)
Your PBS credentials (activation email)
The NimbusBackup activation email contains the following information:
Keep this email safe. These credentials are required for the configuration below.
Encryption: enable it before the first backup
Client-side encryption (AES-256-GCM) must be enabled before your first backup. Once backups have been run without encryption, it is no longer possible to encrypt existing backups.
Enabling and saving the encryption key is the client's responsibility. Without this key, your backups are permanently unreadable — neither you nor RDEM Systems can decrypt them. Store it in a password manager or digital vault.
Step 1 — Access the Proxmox VE interface
Open your browser and log in to your Proxmox VE web interface:
Authenticate with an account that has administrator rights (typically root@pam).
Step 2 — Add PBS storage
In the left panel, click on Datacenter (at the top of the tree), then go to the Storage tab.
- 1Click "Add" at the top of the storage list.
- 2Select "Proxmox Backup Server" from the dropdown menu.
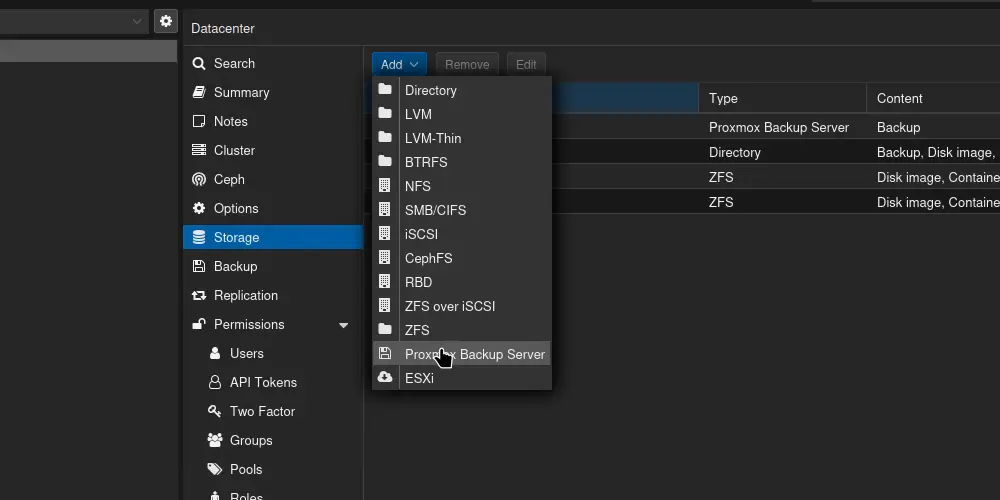
Datacenter → Storage → Add → Proxmox Backup Server
Step 3 — Fill in the connection form
A form appears. Enter the fields with the information from your activation email:
| Field | Value to enter | Example |
|---|---|---|
| ID | Free name to identify this storage | nimbus-backup |
| Server | PBS server address | pbs-01.nimbus.rdem-systems.com |
| Username | PBS user ID | backup@pbs |
| Password | Password received by email | •••••••• |
| Datastore | Dedicated datastore name | ds-your-company |
SSL Certificate: Our PBS servers use valid SSL certificates (Let's Encrypt). The Fingerprint field can be left empty — Proxmox VE will verify the certificate automatically.
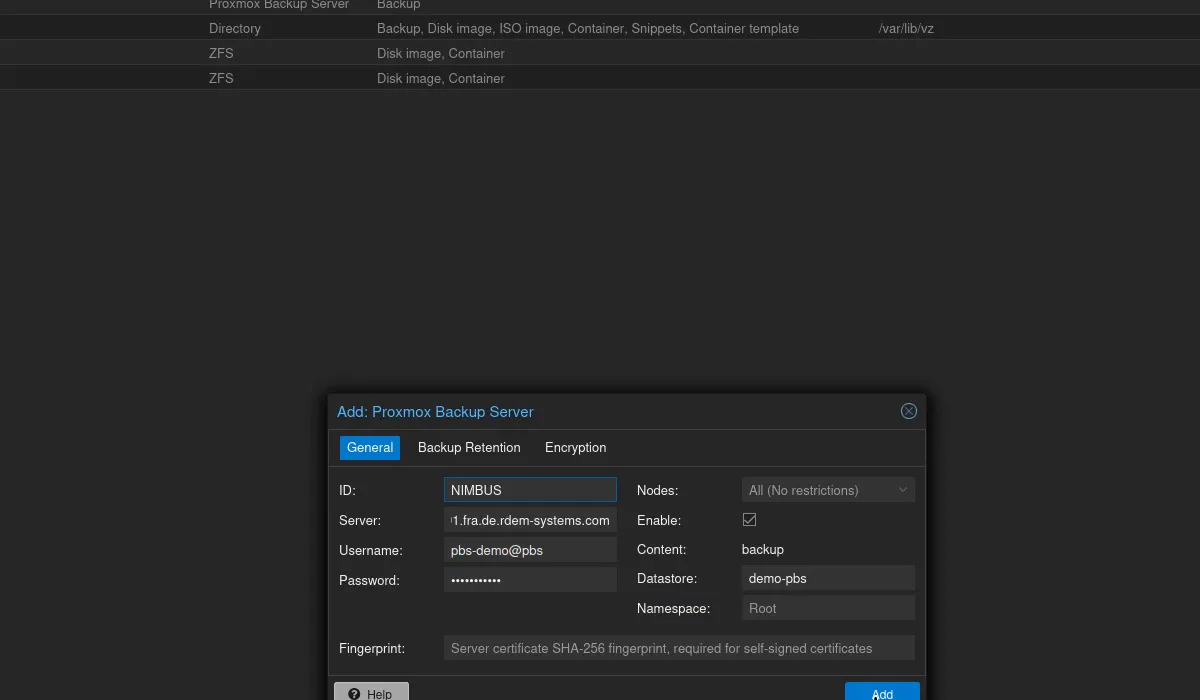
"Add: Proxmox Backup Server" form with fields filled in
Click "Add" to validate. Proxmox VE will test the connection to the remote PBS.
Step 4 — Verify the connection
If the connection is established, the new nimbus-backup storage appears:
- In the storage list (Datacenter → Storage) with type "pbs"
- In the left tree, under each PVE node, with available space displayed
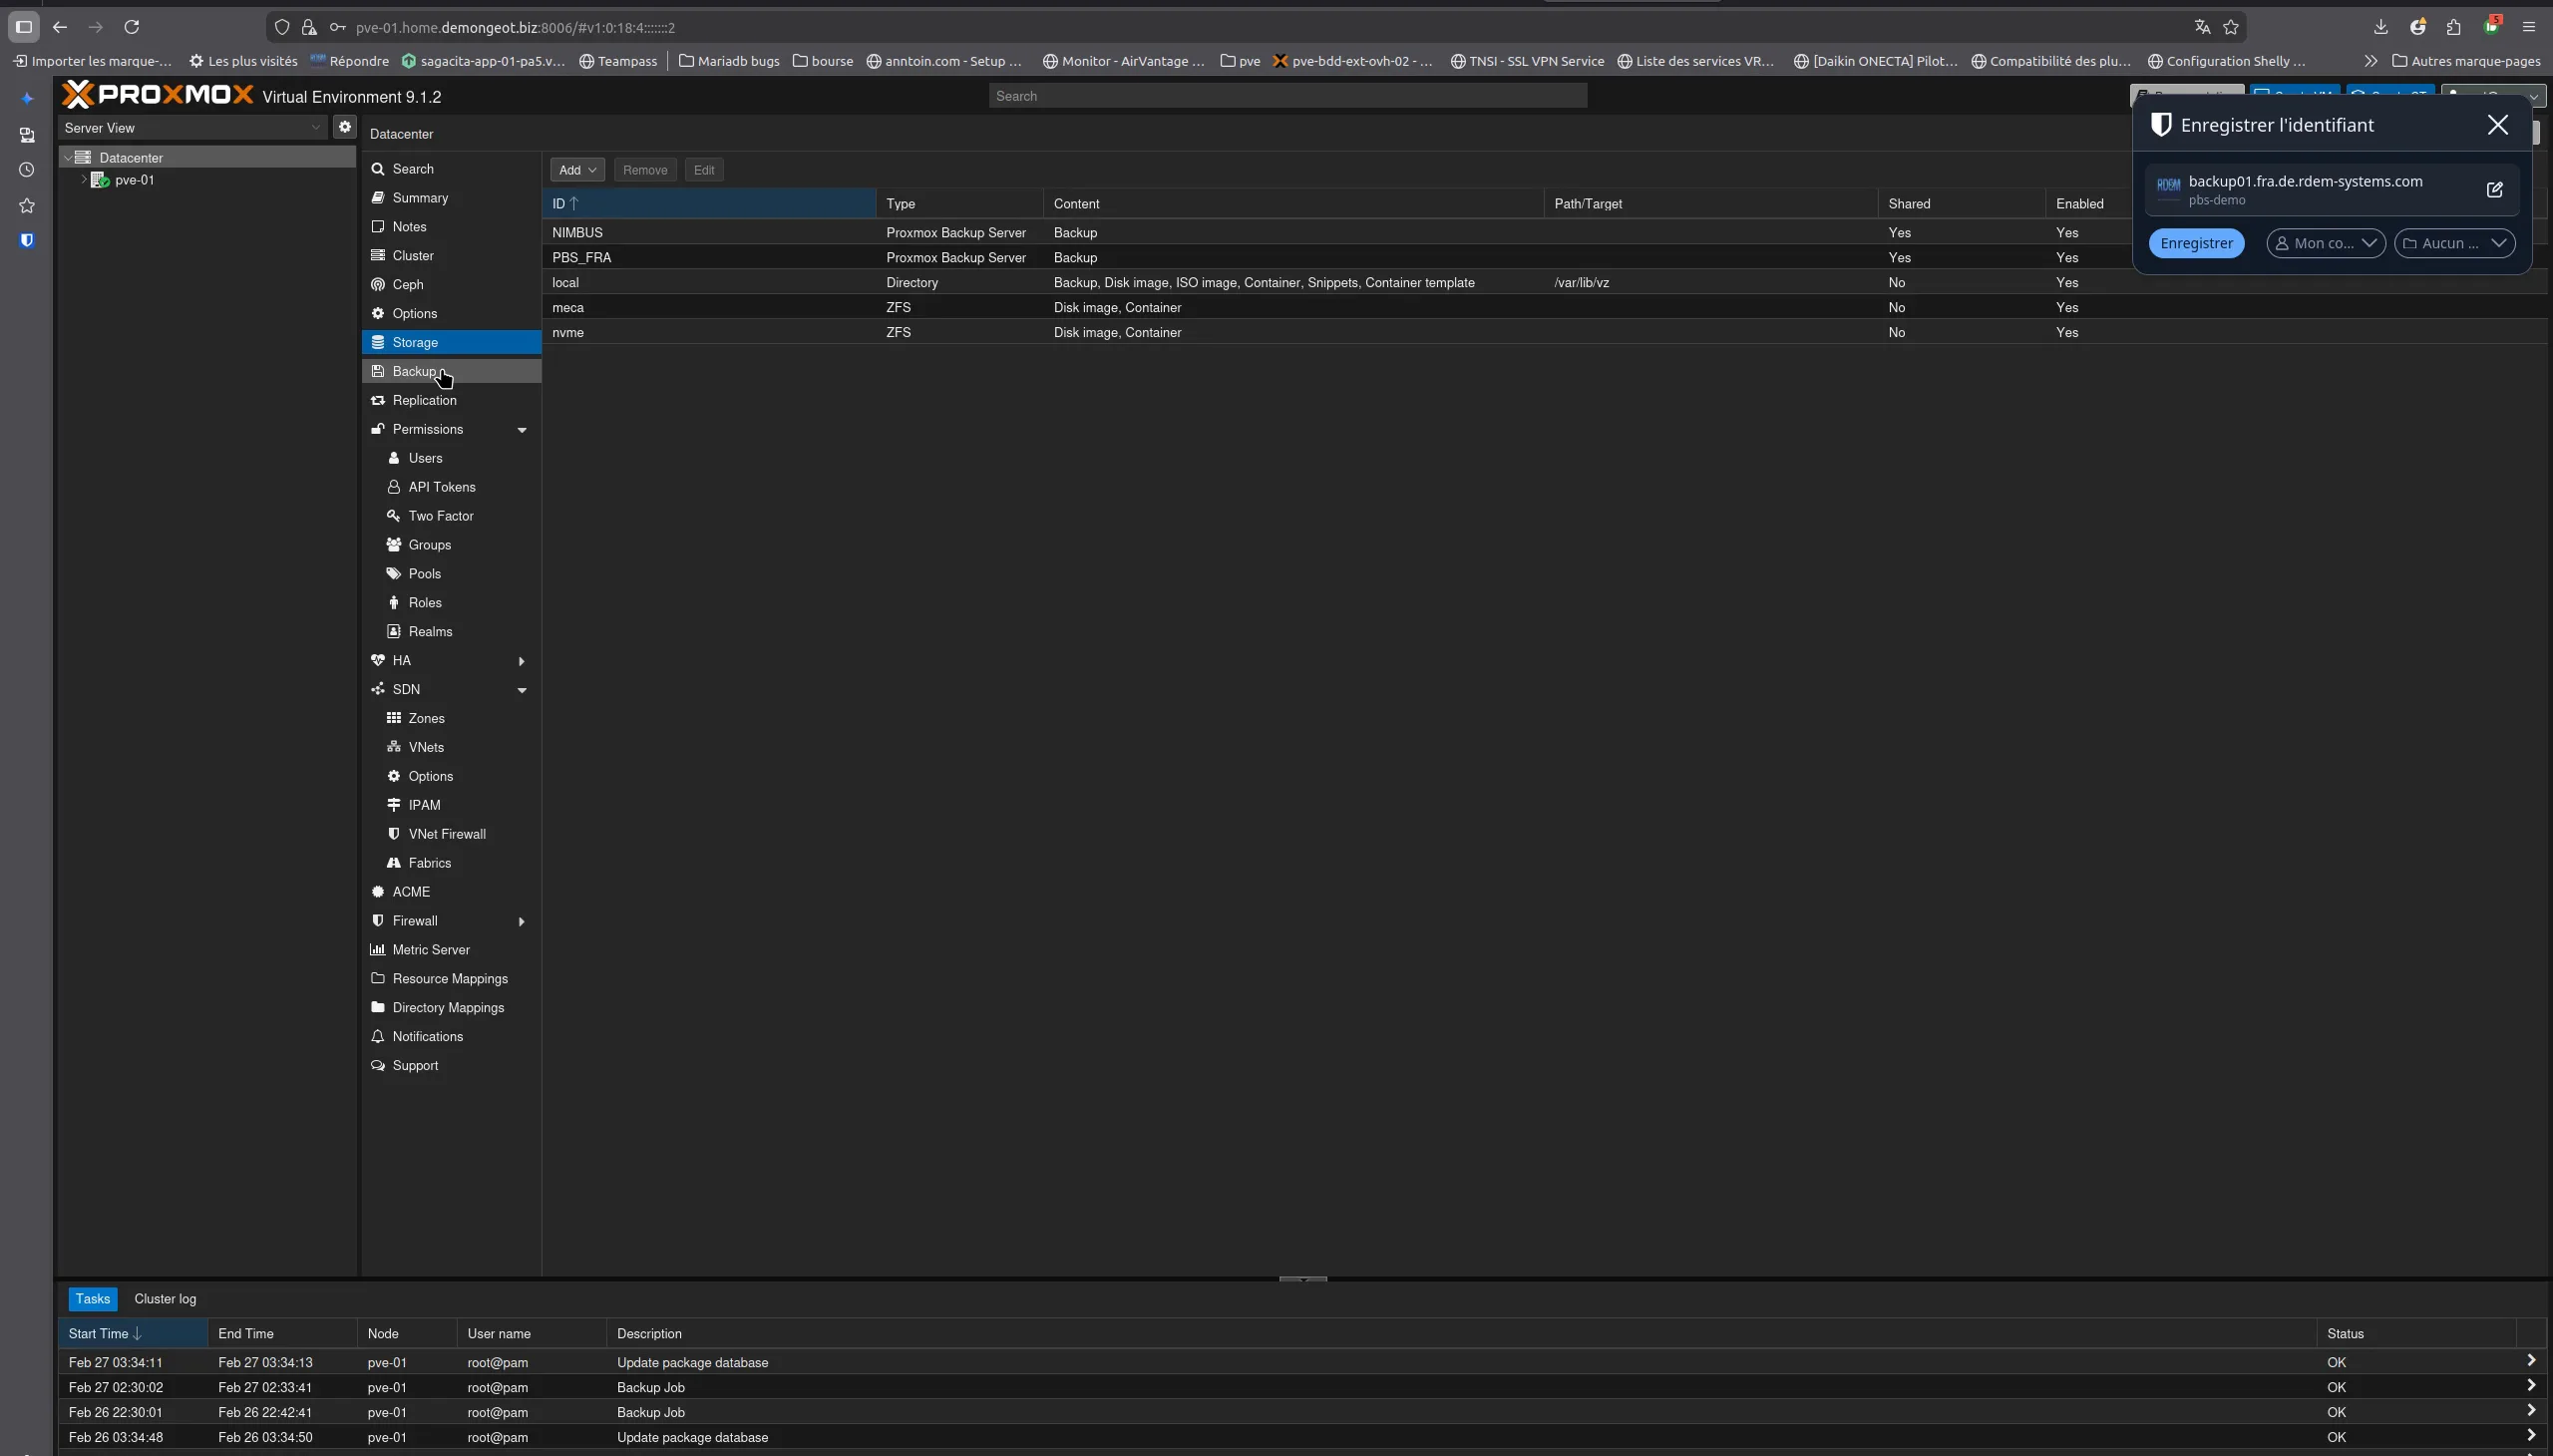
NIMBUS storage appears in Datacenter → Storage (PVE 9.1.2)
In case of connection error
Check that port 8007 is open in your outbound firewall. The PBS protocol uses TCP port 8007 for communication between PVE and the backup server. Also verify the server name and credentials are correct.
Step 5 — Create an automatic backup job
Now that the PBS storage is connected, configure a scheduled backup job to protect your VMs automatically.
- 1Click on Datacenter in the left panel.
- 2Go to the Backup tab.
- 3Click "Add" to create a new job.
- 4Configure the job with the following parameters:
| Parameter | Recommended value |
|---|---|
| Storage | nimbus-backup |
| Schedule | Every day at 01:00 (outside production hours) |
| Selection mode | All (all VMs / containers) |
| Mode | Snapshot (no service interruption) |
| Compression | ZSTD (best speed/compression ratio) |
| Send email to | Your email (notification on error) |
| Notification | On failure only (avoid noise) |
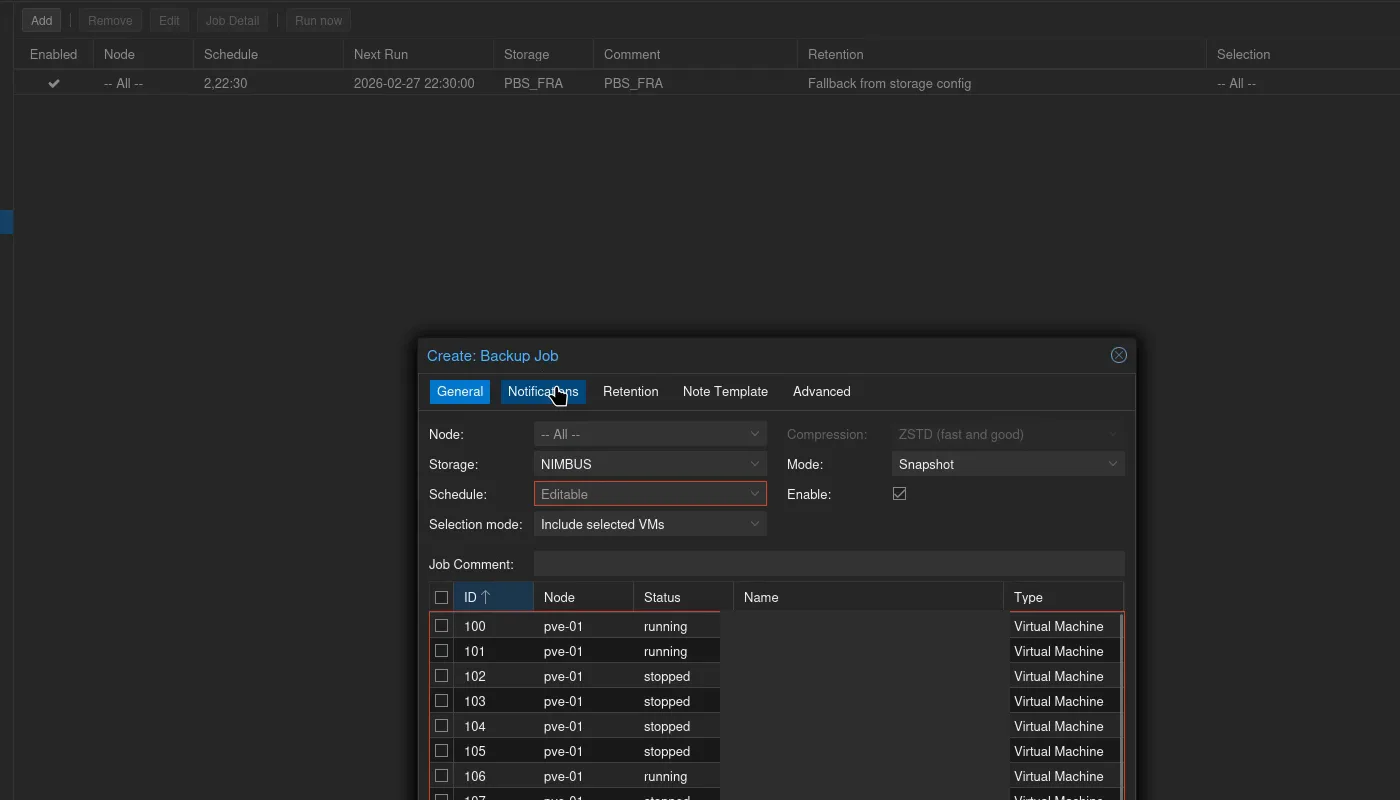
Creating a backup job: NIMBUS storage, Snapshot mode, ZSTD
Click "Create" to save the job. It will run automatically according to the defined schedule.

Datacenter → Backup: the scheduled job appears in the list
Tip: Snapshot mode performs the backup while VMs are running, without stopping them. This is the recommended mode for production environments. If your VMs use the QEMU agent (qemu-guest-agent), snapshots will be application-consistent (filesystem freeze).
Step 6 — Run a test backup
Before waiting for the next automatic trigger, test immediately with a manual backup:
- 1Select a test VM in the left tree.
- 2Go to that VM's Backup tab.
- 3Click "Backup now".
- 4Select nimbus-backup as the destination storage, Snapshot mode, ZSTD compression.
- 5Click "Backup" and watch the progress in the task window.
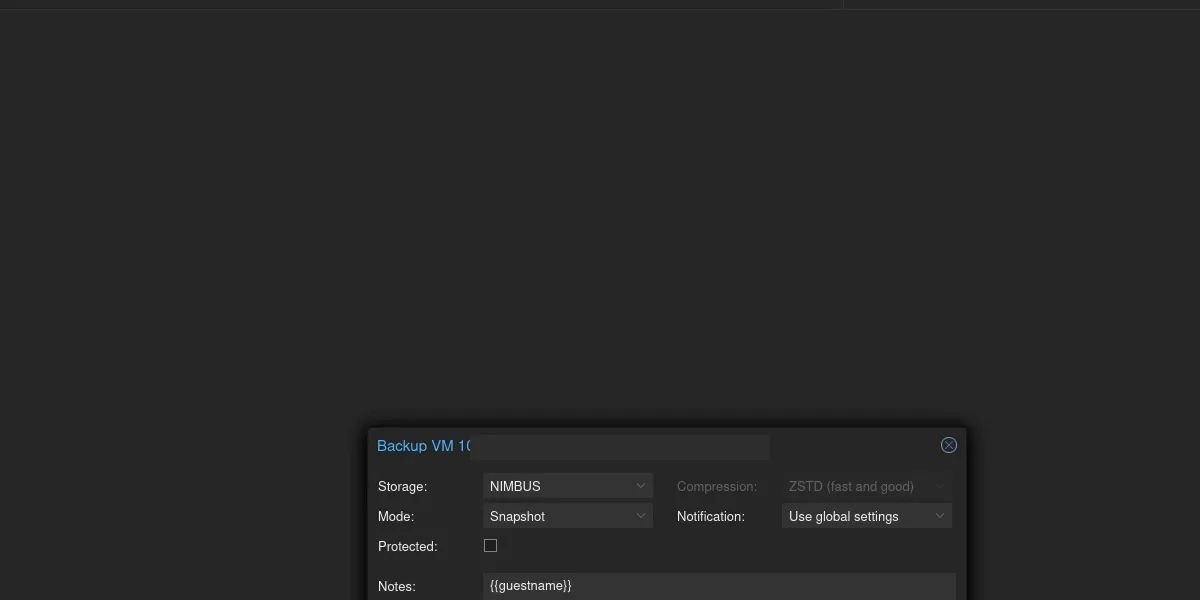
"Backup now" dialog: NIMBUS selected, Snapshot, ZSTD
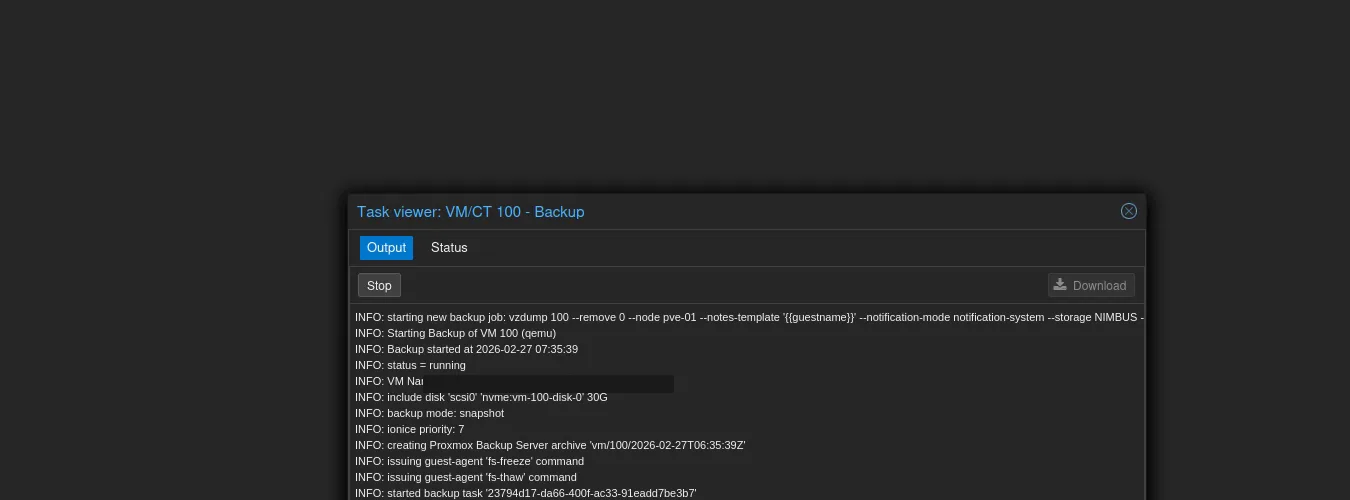
Backup in progress: 30 GiB transferred, fs-freeze via guest-agent
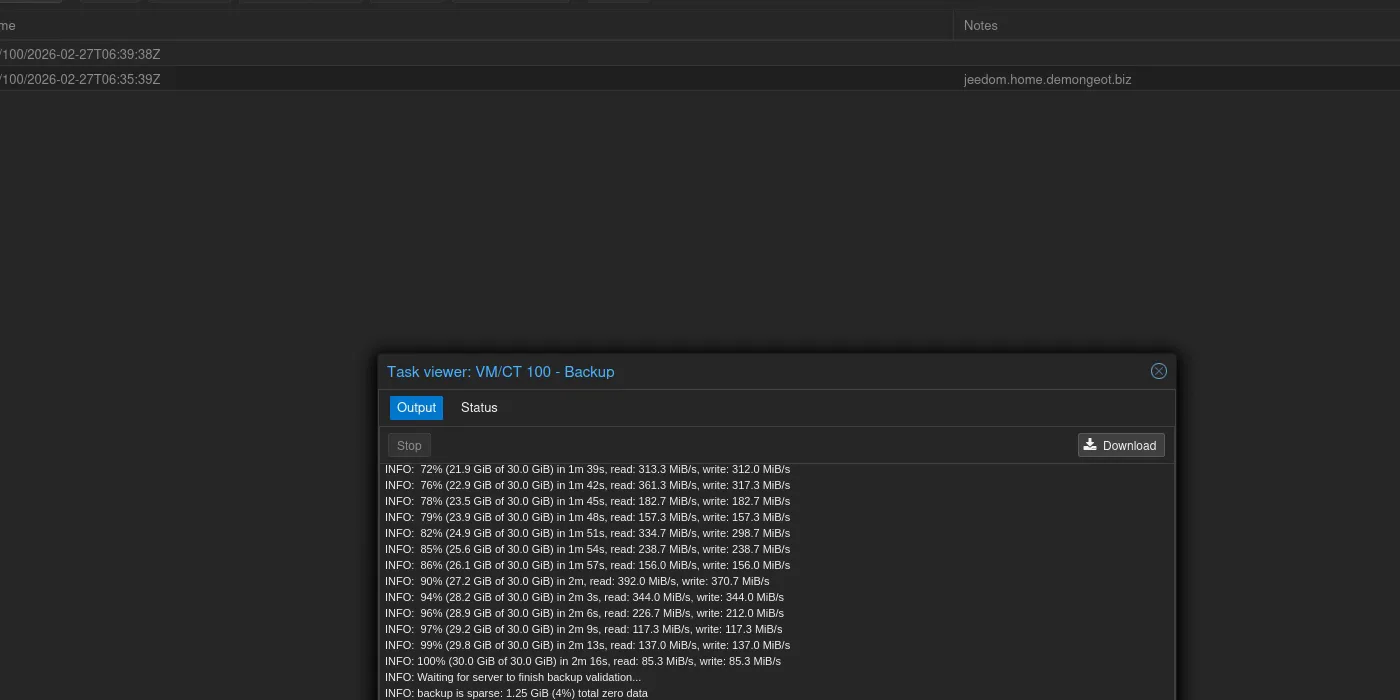
Backup complete: 30 GiB in ~2 min, deduplication and validation OK
PBS deduplication: The first backup transfers all data. Subsequent backups only transfer modified blocks thanks to PBS client-side deduplication. You will notice a significant reduction in time and bandwidth from the second backup onward.
Step 7 — Verify the restore
A backup that has never been tested for restoration is not a backup. Verify that restoration works:
- 1Go to the nimbus-backup storage in the left tree.
- 2Content tab — you see the list of your backups.
- 3Select a backup and click "Restore".
- 4Choose a different VMID to avoid overwriting the original VM (e.g., temporary VMID 9999).
- 5Verify the restored VM starts correctly, then delete it.
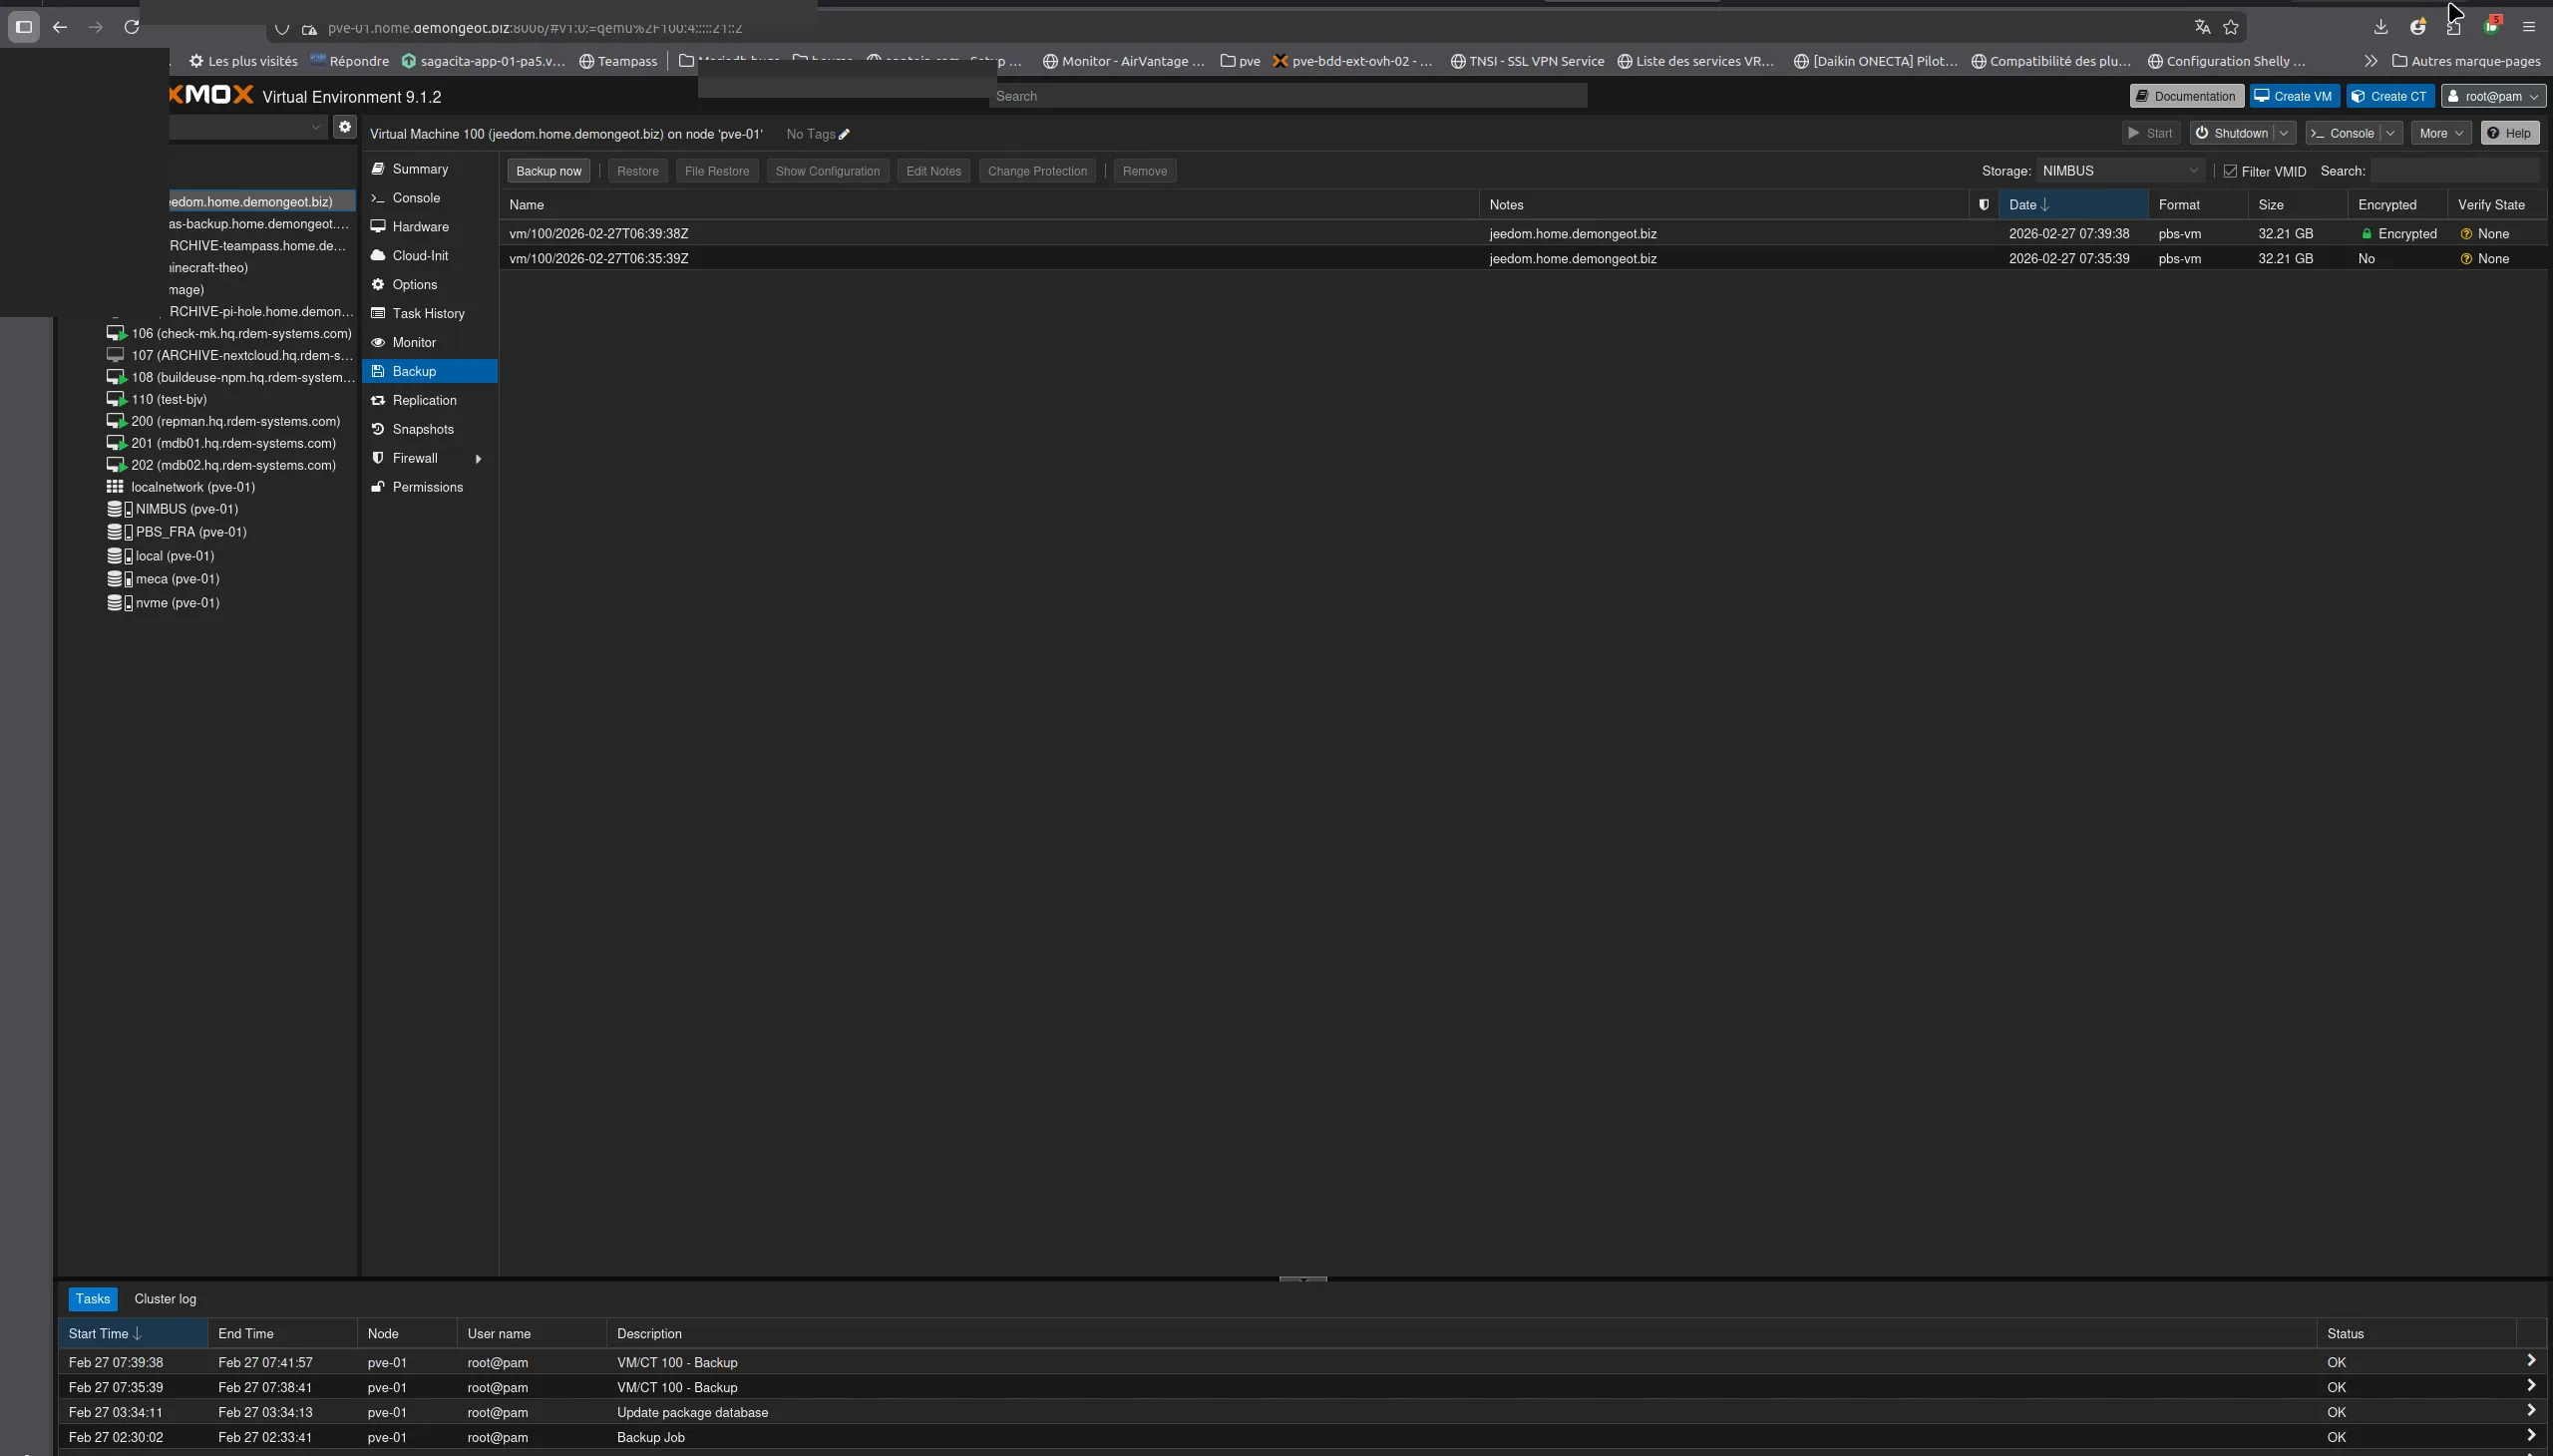
Storage NIMBUS → Content: your backups are listed with Restore options
Important: test regularly
Schedule a restore test at least once per quarter. An untested backup may contain corrupted data without you knowing.
Best practices
Client-side encryption
To enable client-side encryption (AES-256-GCM), add an encryption key in the Encryption tab of the PBS storage. Your data will be encrypted before leaving your server. Store the encryption key safely.
Backup retention
The retention policy is configured on the PBS side by NimbusBackup. Default: 7 daily, 4 weekly, 3 monthly backups. Contact us to adapt retention to your needs.
QEMU Agent
Install qemu-guest-agent in your VMs for application-consistent snapshots. On Debian/Ubuntu: apt install qemu-guest-agent.
Firewall
Make sure TCP port 8007 is open outbound to the PBS server. If you use a proxy, configure it to allow long connections (backups can last several minutes).
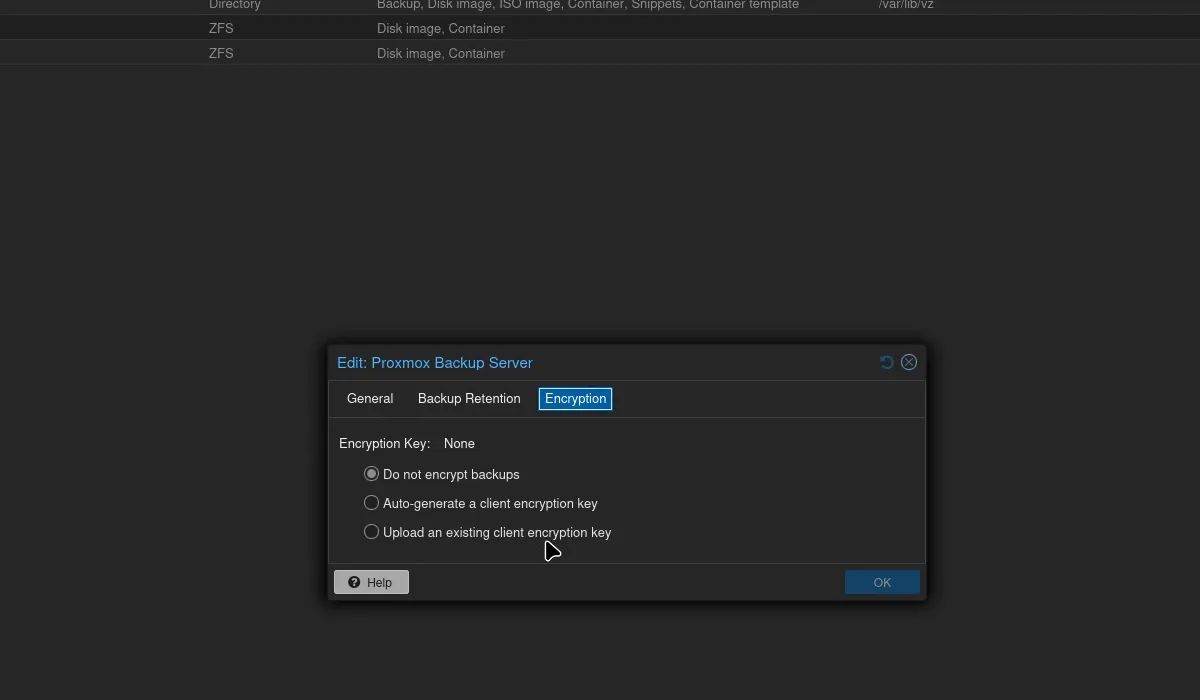
Encryption tab: client-side encryption
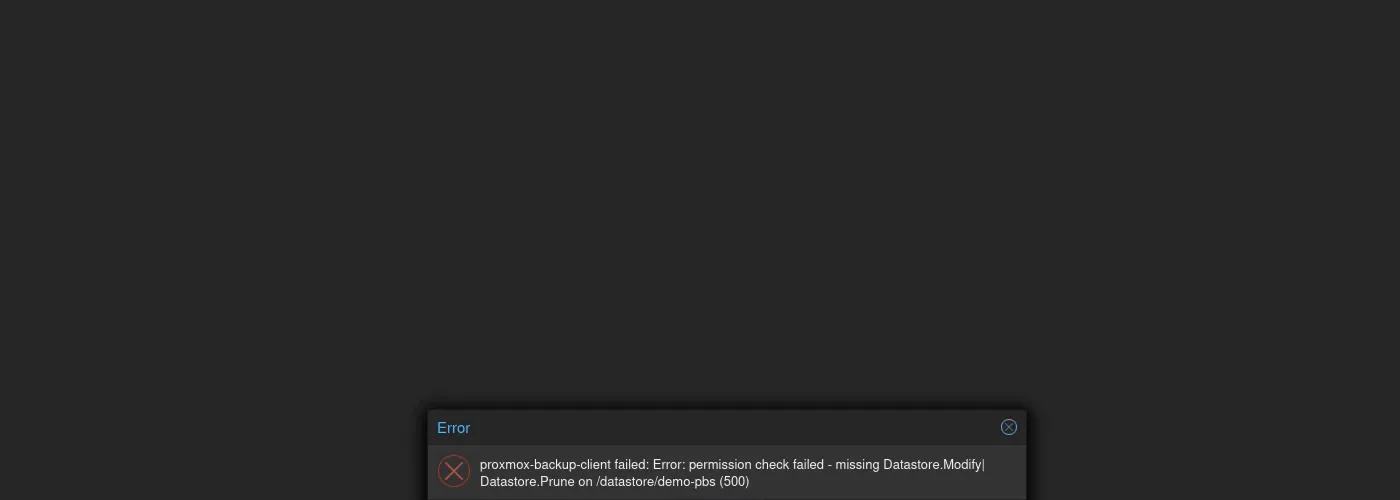
Protection: backup deletion is denied from the client side
Save your encryption key!
If you enable client-side encryption, the encryption key is the only way to read your backups. Without this key, your backups are permanently unusable — neither you nor RDEM Systems can decrypt them. Store it in a password manager, a digital vault, or print it and keep it in a safe place.
Summary
Your Proxmox VMs are now automatically backed up to your NimbusBackup PBS. If you have any issues or questions, contact our support: support@rdem-systems.com.
Sources and references
Need help with the configuration?
Our technical team can connect remotely to configure your PBS in minutes.